

Hello!
We're glad to see you here. Thank you for taking on this free beginner project.
Sewing is a craft enjoyed by many since the beginning of time. We find satisfaction in the process of creating. Sewing is one of the best ways of creative expression. Every project finished is uniquely yours. Sewing projects are pieces of art that we wear, decorate space with, or gift to family and friends. It is a beautiful hobby. And we are happy that you choose us to be a part of your sewing journey.
Here is a little bit of a story about us. We are Thimball. Thimball is a printable sewing pattern brand. We pride ourselves on our fresh, modern, and minimalist sewing patterns. We love to help people discover the joys of sewing. We plan to release a series of FREE beginner-friendly projects. This is the first of many.
This project will guide you from the beginning, so it is perfect if you have never sewed before. The project will guide you through:
Printing your free sewing pattern
How to assemble your sewing pattern
The tools you need
How to use your sewing machine
How to choose your fabric for this project
The basics of how to read your sewing pattern
How to transfer & cut the sewing pattern details onto your fabric
How to sew a straight stitch
Accuracy tips to make your project professional looking
Please enjoy! We hope you will love your very own tote bag.
If you need any help at all, contact us. We are always here to help.
2. Open the 8.5” x 11” print file in Adobe Acrobat
If you don’t already have Adobe Acrobat, download it here.
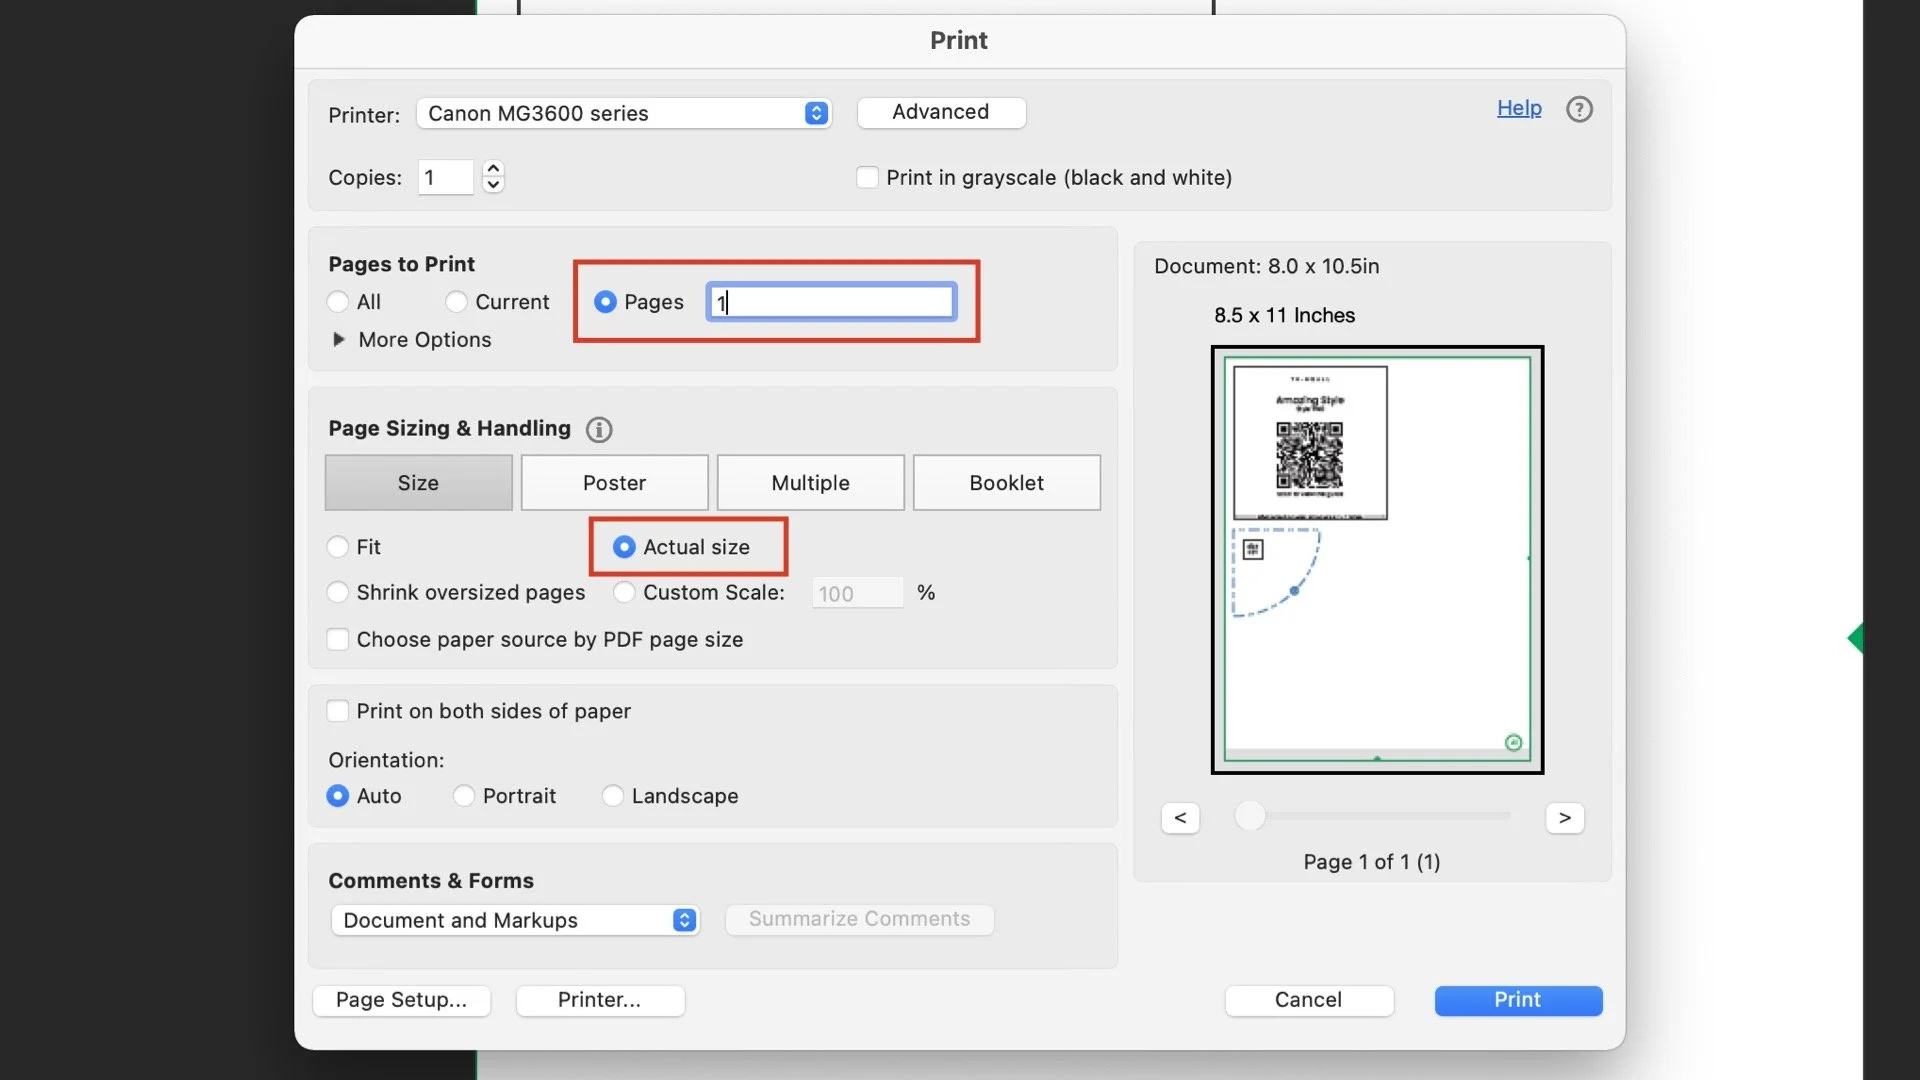
3. Open the print panel

4. Print page 1 only
Under the Pages to Print section, select ‘Pages’ and type “1”
Under the Page sizing & handling section, ensure ‘Actual size’ is selected
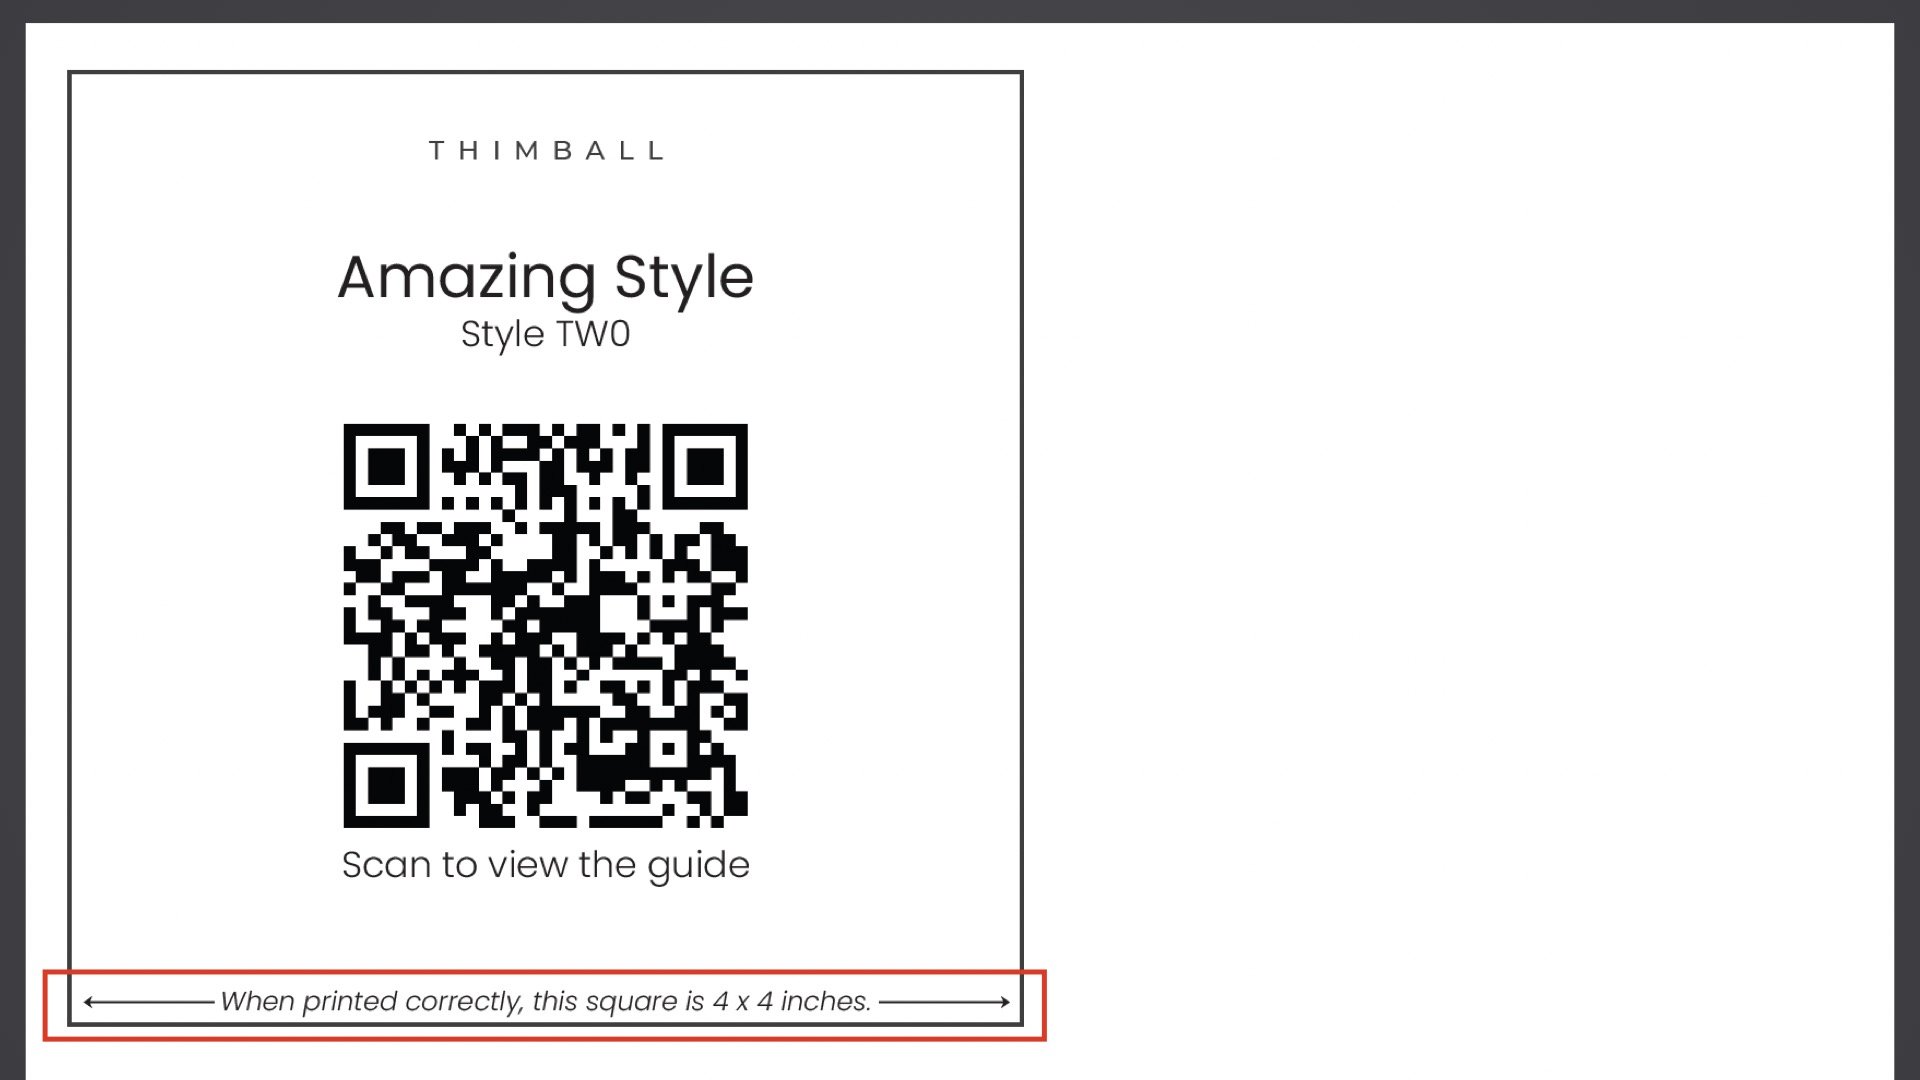
5. Measure the square
If incorrect, adjust the print settings until the square measures correct.
6. Print the remaining pages
Under the Pages to Print section, select ‘Pages’ and type 2 - [total pages]

STEP 2
Assemble the pattern
1. Lay the pages out as required
Row 1 = A1, A2, A3…
Row 2 = B1, B2, B3…
Row 3 = C1, C2, C3…
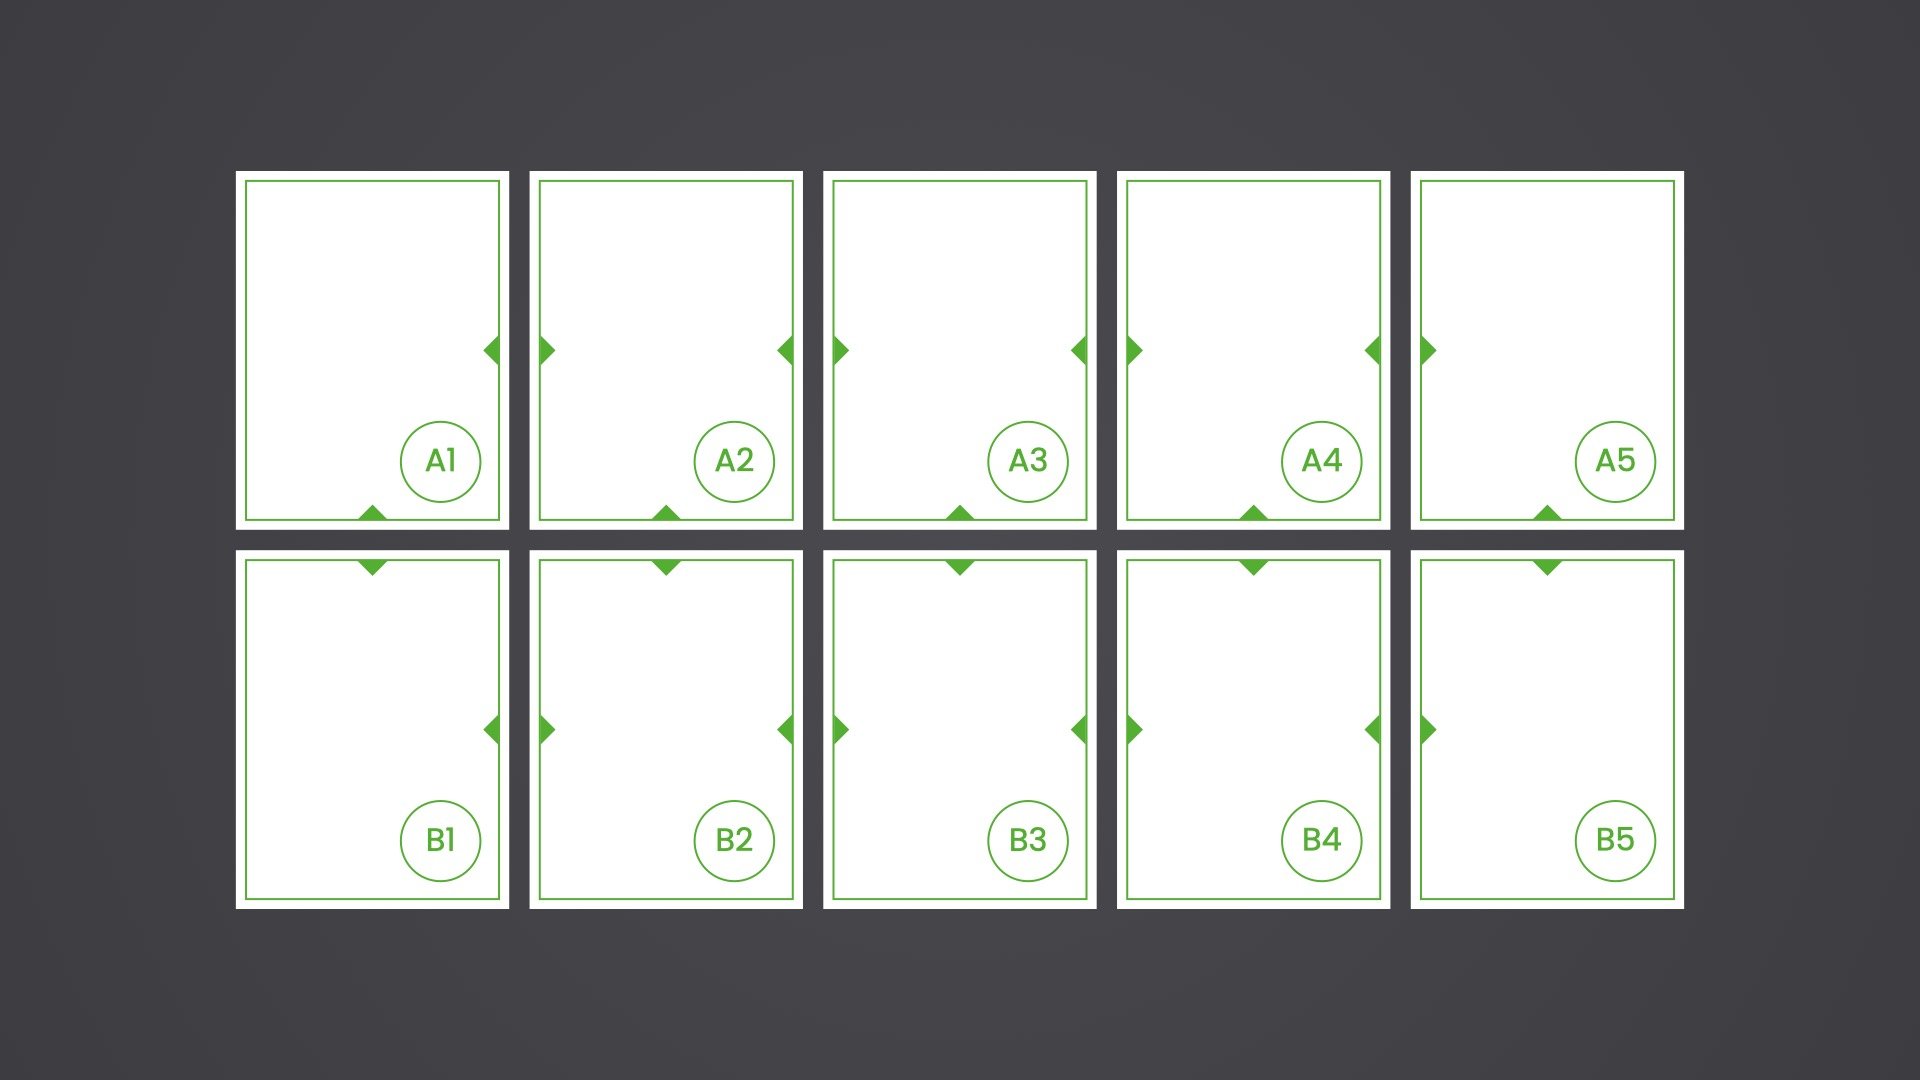
2. Cut out the rectangles on each page

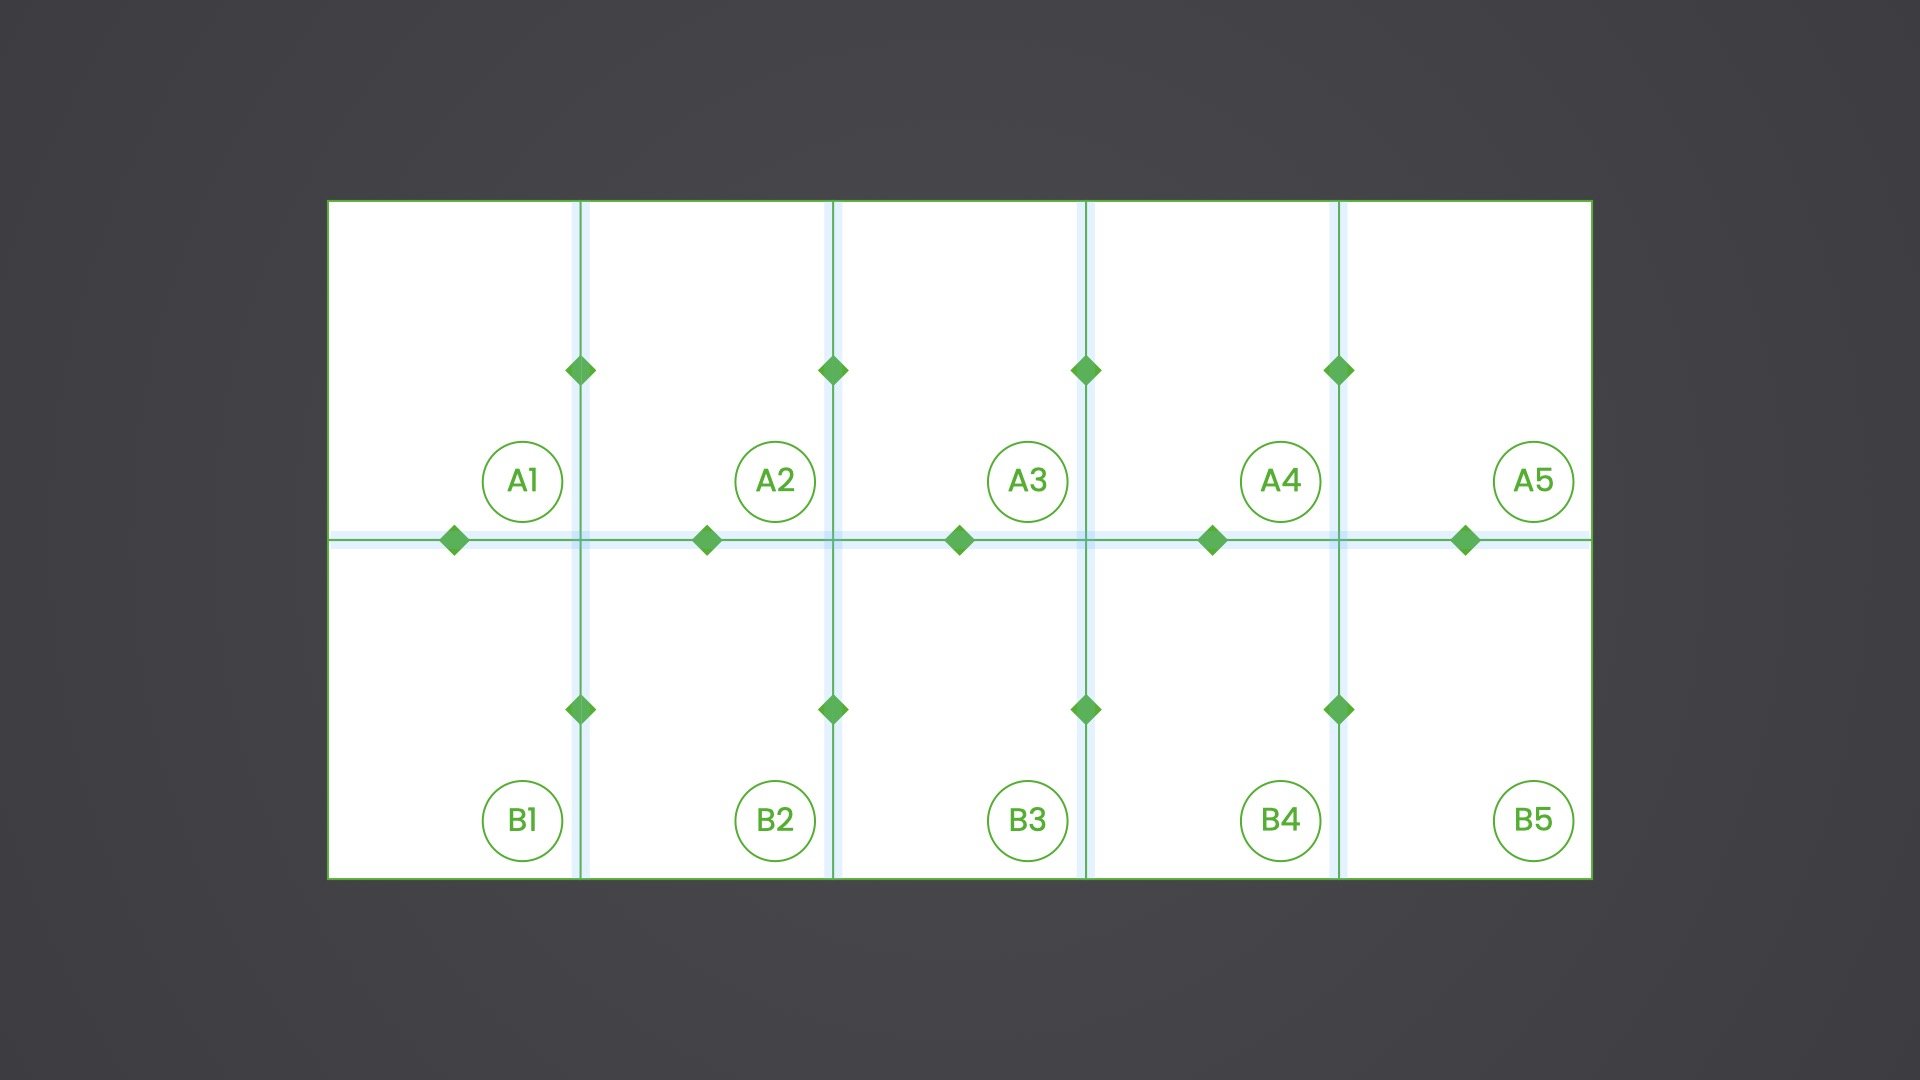
3. Arrange and tape the rectangles together
For accurate alignment, match the diamonds along the edges
STEP 3
Round up your tools
Sewing machine
Scissors
Ruler
Sticky Tape
Pins
Fabric pen or chalk
Fabric Scissors or Rotary Cutter
Measuring Tape
Tracing Wheel
Carbon Paper
Iron and ironing board
The video helpers in this project are from Made to Sew Youtube Channel. We love their beginner-friendly tutorials! Thank you, Made to Sew, for helping beginner sewers take the first steps in their sewing journey.
STEP 4
Gather your materials
Product measurements
Width: 15 in.
Height: 12 in.
Depth: 6 in.
Strap length: 26.5 in.
Fabric
Required: 1.75 yds. of 44 in. wide
Recommendations: Woven fabrics such as Broadcloth & Cotton, Linen, Chambray, Canvas & Duck or Cotton Blends.
STEP 5
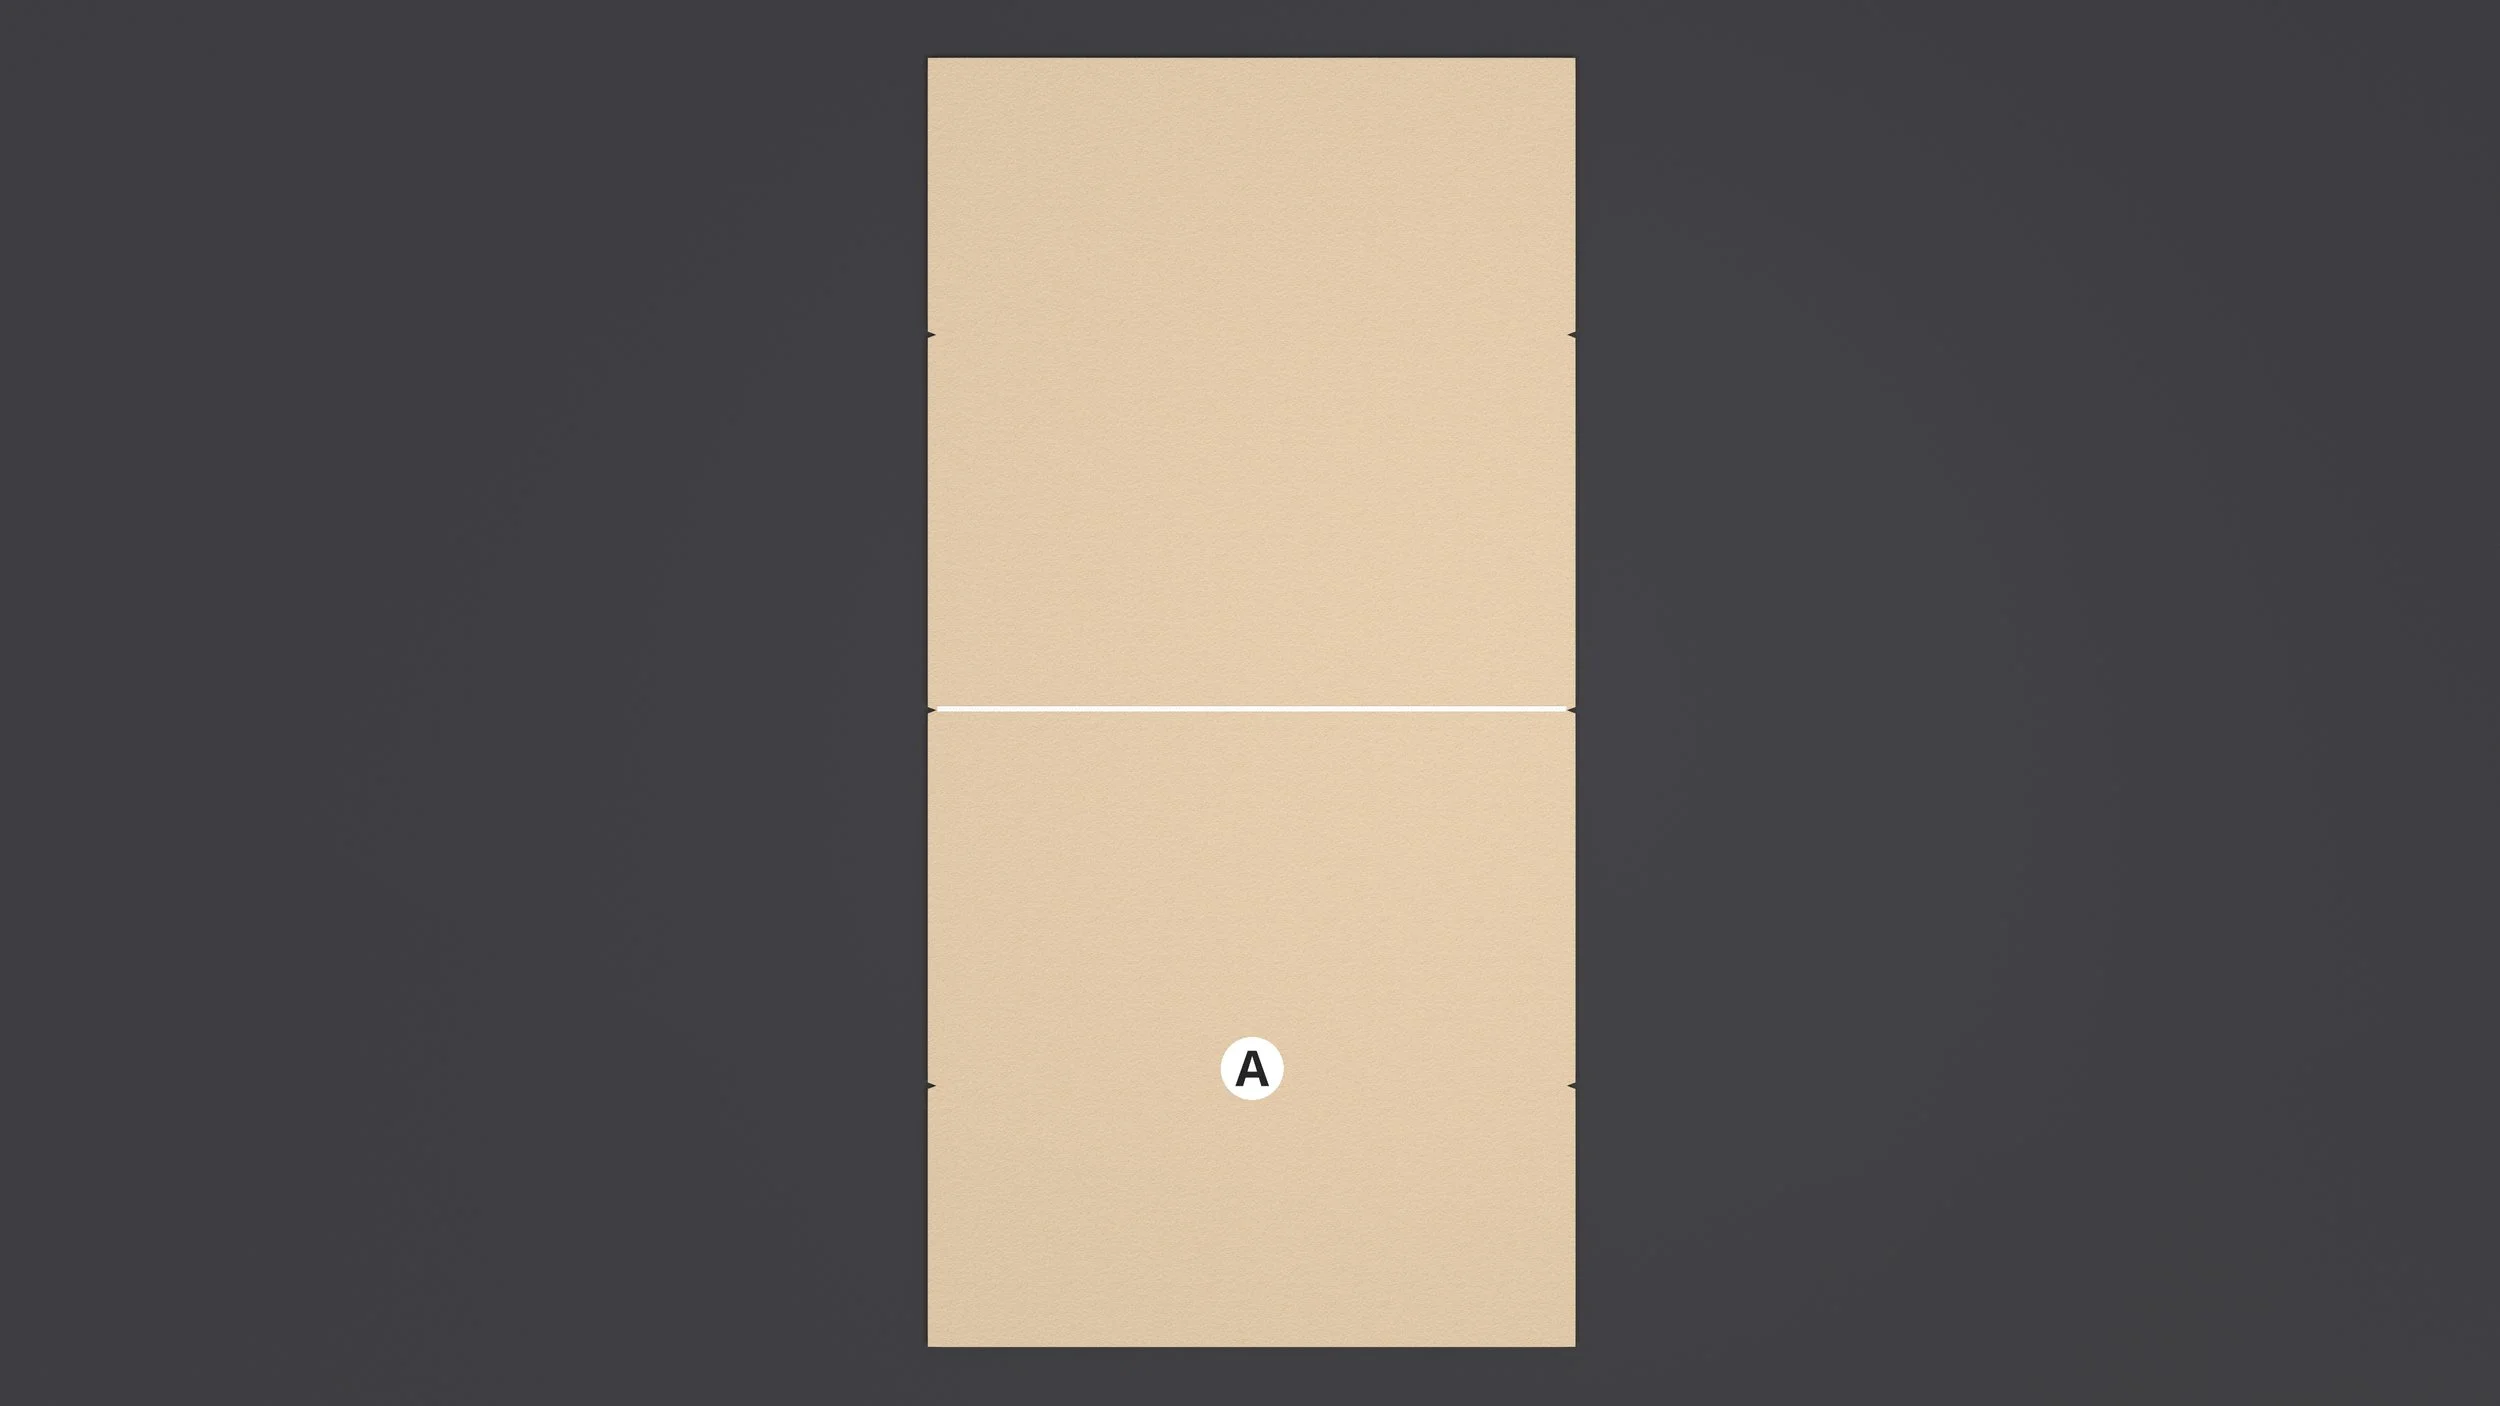
Cut out the paper pattern pieces
A - Body
B - Sides
C - Straps
STEP 6
Cut out the fabric pieces
Seam allowance and hem allowance are already included.
Follow the cut instructions on the paper pieces

STEP 7
Label your fabric pieces
For clarity, we made the wrong side of our fabric darker.
For a closer look, you can click or double-tap on the images to activate zoom.

BEFORE YOU SEW
Watch these 3 video tutorials

STEP 8
Fold the center

STEP 9
Fold the base
Fold 3 inches up from the center fold; total base width is 6 inches


STEP 10
Hem the edges
There is 3/4 inch hem allowance
We chose a double-fold hem and finished it with a straight stitch What should I choose?


STEP 11
Sew the side seam
Use 1/4 inch seam allowance
We chose a straight stitch
Align with notches


STEP 12
Fold the allowance
Use 1/4 inch seam allowance
Fold and press


STEP 13
Fold the center
Fold and press


STEP 14
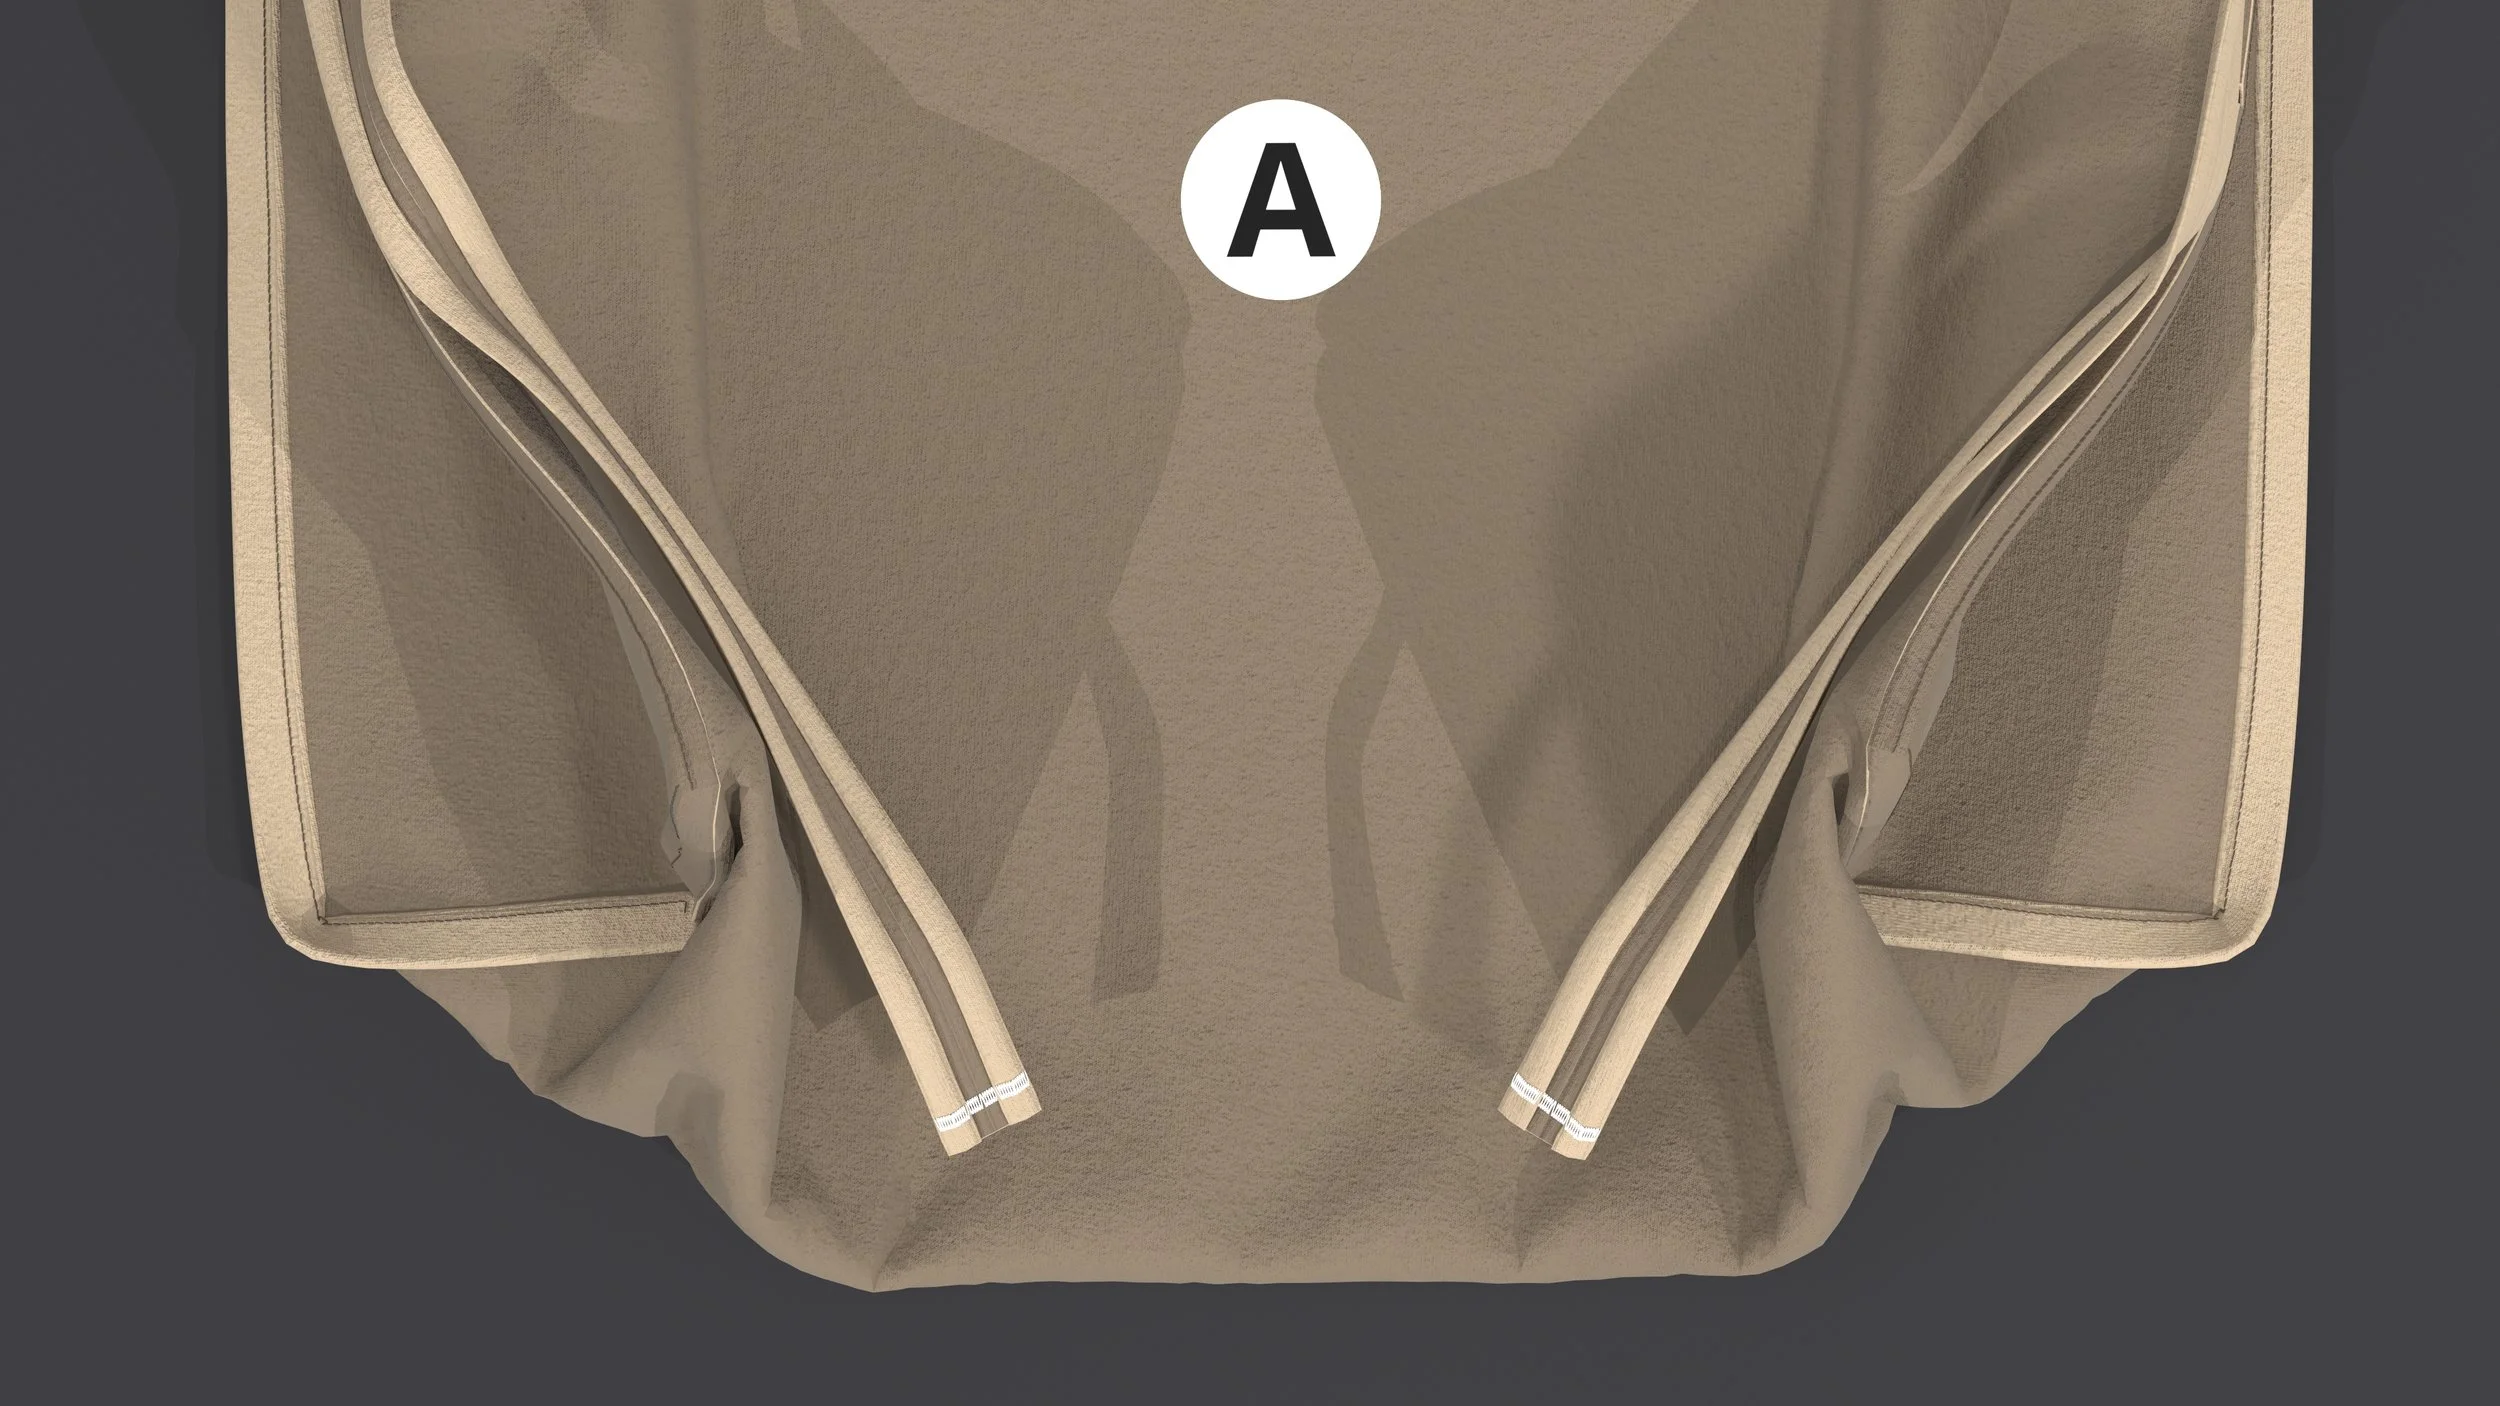
Attach the strap
Use 1/4 inch seam allowance
We chose a straight stitch
Align the folded seam allowance of the straps to the seam allowance of the side panels


STEP 15
Close the strap
We chose a straight stitch
Sandwich all the seam allowances inside the folded strap


STEP 16
Fold the edges
Align the folded edges over the sewn strap

STEP 17
Attach the strap
Use 1/4 inch seam allowance
We chose a straight stitch
Align the folded seam allowance of the straps to the seam allowance of the side panels

STEP 18
Close the strap
We chose a straight stitch
Sandwich all the seam allowances inside the folded strap


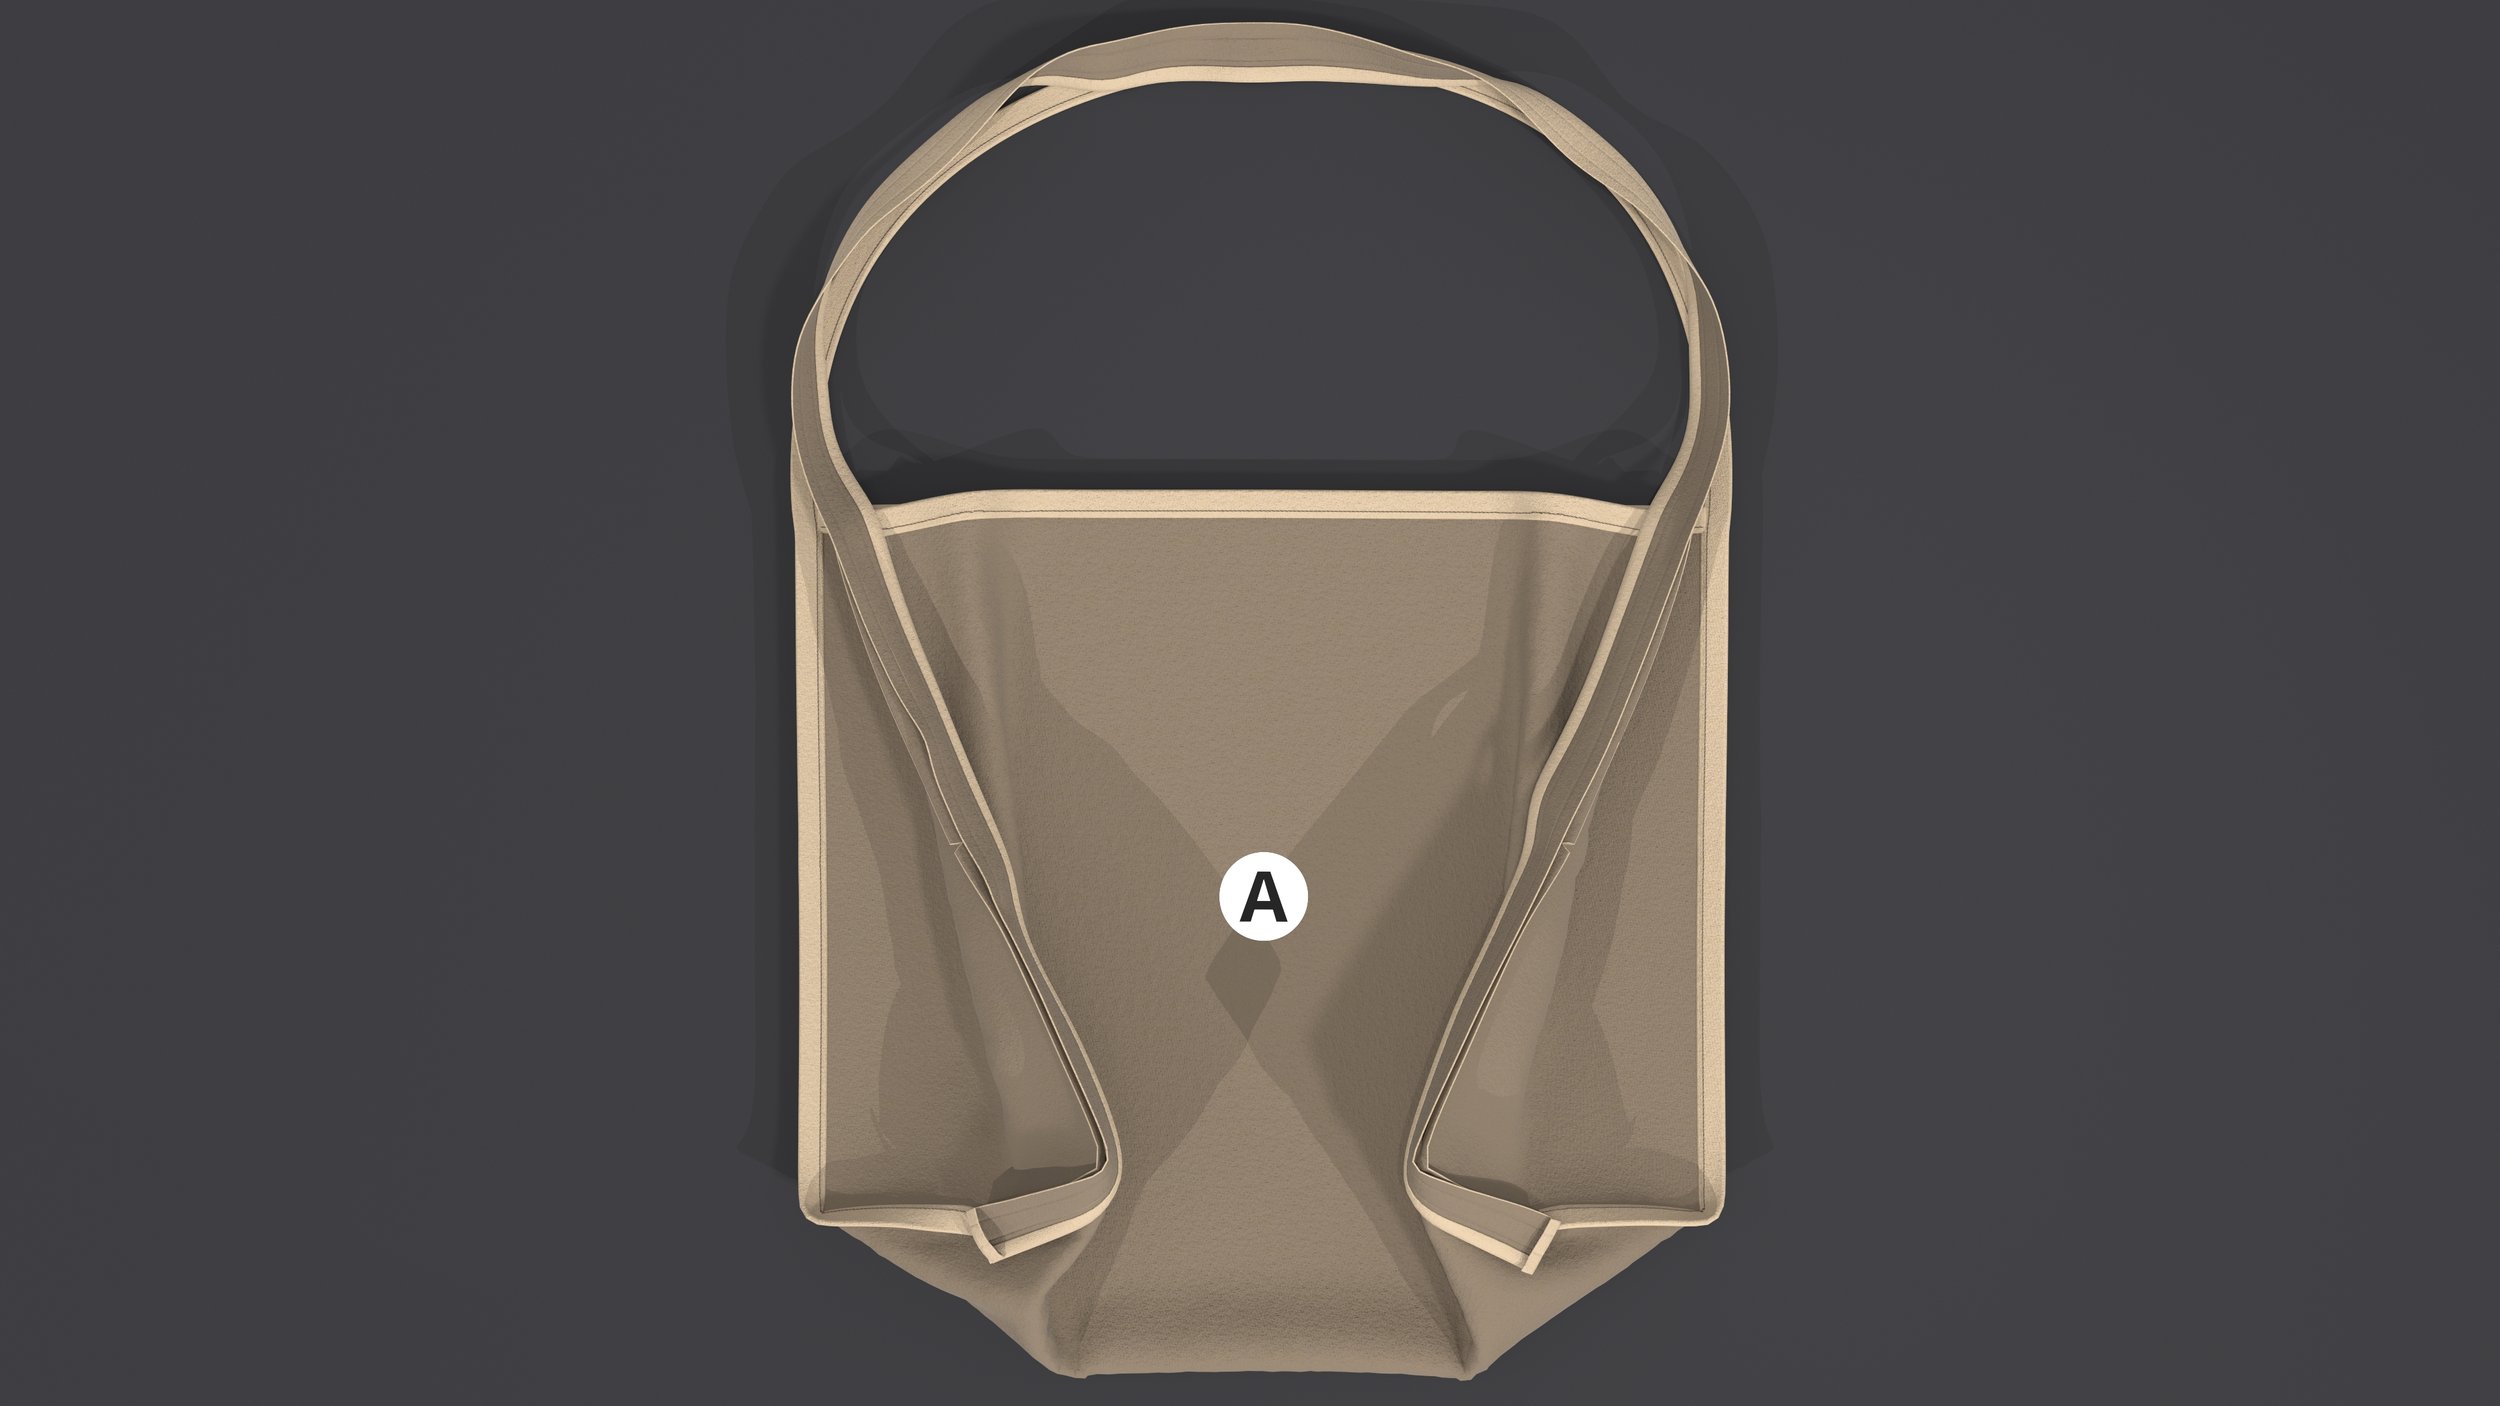
COMPLETE
You did it!
Be a pro! Trim any excess thread and allowances, then, give it a good iron.
